
And now back to regular programming on the blog...
I've said before Pinterest is almost overwhelming with all these ideas I don't have time to do. But I've been more intentional about using it for recipes that are practical for me. Of course, I've pinned some fun ones, too.
Here's my review of what I've made:
Chicken Broccoli Supreme
This was advertised as a casserole that didn't use "cream of" something soup. But I realized when I made it, there is probably just as much if not more cream in it. I also attempted to cut the recipe down and put it in an 8x8 casserole dish, and I didn't adjust the sauce very well. In the end, I wish I had just made my mom's chicken devan or poppyseed chicken.
Hasselback potatoes
I actually like this one. It was a good alternative to a standard baked potato.
Krispy Kreme muffins
I'm convinced the muffins here are the same as a puffin from the Bread Basket on Signal Mountain. After I made them with the icing, I wished I had made them like a puffin: rolling it in sugar and cinnamon. But they were still great with the icing.
Nutella cupcakes
I only made the cupcakes from this, not the complicated three flavor swirl icing. I iced them with canned cream cheese icing. The cupcakes were good chocolate cupcakes, but they didn't really have a Nutella flavor. So there's another recipe I'd like to try sometime.
Artichoke bread
This might be my favorite. Basically, it's a dip spread on bread and baked. It's really easy and a crowd pleaser (I took it to a Super Bowl party).
That's what I have tried so far, but I bought the ingredients for a pasta dish I'm going to try this week.
Showing posts with label recipe. Show all posts
Showing posts with label recipe. Show all posts
Monday, February 6, 2012


Thursday, October 13, 2011
Pumpkin brownies, bread machine and soup
I did a fair amount of cooking and baking over the weekend, and I have a few things to report on.
I still haven't given up on creating the right chocolate/pumpkin brownie combo. This time I achieved the appearance I wanted. These definitely looking like marble brownies. But there wasn't a lot of pumpkin in them, and I wonder if I could layer it a little bit.

With the leftover pumpkin batter, I added some flour and baking powder to make pumpkin muffins. Considering I was not following a recipe at all they turned out pretty well.
I live in the oldest neighborhood in town, and I've learned that this means there are a lot of estate sales and garage sales. There's at least one estate sale and close to a dozen garage sales in about a mile radius of my house. I'm not a true garage sale shopper because I don't get up early to go. I usually stop at a couple around 10 or 11 in the morning after I've been to the farmers' market.
Of course, the estate sales are where the best stuff seems to be, and I stopped at a pretty good one on Saturday. I was very tempted by a twin bed, but it turned out it had been sold already. I did find a breadmaker that I negotiated to $8. I've been wanting a breadmaker for a while, but was always hesitant to spend the money on another kitchen appliance.
I tested it out and made some good bread on Sunday. It's obviously an older model, and I had to look up the instruction manual online. But I can't seem to find a lot of recipes out there. So I'll take suggestions!
And lastly, I made cauliflower soup after enjoying some at Coralie's house. It's a Pioneer Woman recipe, which obviously means you can't go wrong, but I'm not a cauliflower fan and I loved this soup.
I still haven't given up on creating the right chocolate/pumpkin brownie combo. This time I achieved the appearance I wanted. These definitely looking like marble brownies. But there wasn't a lot of pumpkin in them, and I wonder if I could layer it a little bit.

With the leftover pumpkin batter, I added some flour and baking powder to make pumpkin muffins. Considering I was not following a recipe at all they turned out pretty well.
I live in the oldest neighborhood in town, and I've learned that this means there are a lot of estate sales and garage sales. There's at least one estate sale and close to a dozen garage sales in about a mile radius of my house. I'm not a true garage sale shopper because I don't get up early to go. I usually stop at a couple around 10 or 11 in the morning after I've been to the farmers' market.
Of course, the estate sales are where the best stuff seems to be, and I stopped at a pretty good one on Saturday. I was very tempted by a twin bed, but it turned out it had been sold already. I did find a breadmaker that I negotiated to $8. I've been wanting a breadmaker for a while, but was always hesitant to spend the money on another kitchen appliance.
I tested it out and made some good bread on Sunday. It's obviously an older model, and I had to look up the instruction manual online. But I can't seem to find a lot of recipes out there. So I'll take suggestions!
And lastly, I made cauliflower soup after enjoying some at Coralie's house. It's a Pioneer Woman recipe, which obviously means you can't go wrong, but I'm not a cauliflower fan and I loved this soup.
Monday, September 26, 2011
Co-op vs. the farmers' market
Moving to a new city meant giving up my co-op in Virginia. I did some searching for CSAs here, but it was too late in the season to start one. I decided to make the best use of the farmers' market instead.
While the market is significantly smaller than the one I went to in Virginia, there's still everything I want and enough variety. I usually make it about every other week. I go in with a certain amount of cash to spend, and my goal is to spend all of it and get several small portions of things. It's amazing what all I can get for $8 to $10. And while I have less stuff going bad, I also finish stuff before I get tired of it.
In a lot of ways this is more practical and cost-efficient than the co-op. The downside is that I know what I like and tend to gravitate to the same things every week. The co-op forced me to try new things, and I often had an abundance of something so I ended up using it several different ways.
This week I created a rule for myself that I had to get one new thing every time I went to the market. I decided on spaghetti squash on Saturday.
I had heard about spaghetti squash before, and I'm sure plenty of people had told me about it, but I had never tried it. Last fall I kept expecting it to show up in my share, but it never did. I was so enamored with the other winter squashes I had never tried before that I didn't think I was missing anything.
I decided to go ahead and cook the squash on Saturday since I was at home and had some time. I quickly realized I had been missing out on something wonderful. All I did was cook it in the oven for an hour or so and then pull the strands out and heat them with butter on the stove. It was great just like that, but my mind started to churn with possibilities that I'll be experimenting with this week.
And I think spaghetti squash will be on my always get list at the market. What else have I missed that I should try next? I'm considering being brave and trying eggplant.
While the market is significantly smaller than the one I went to in Virginia, there's still everything I want and enough variety. I usually make it about every other week. I go in with a certain amount of cash to spend, and my goal is to spend all of it and get several small portions of things. It's amazing what all I can get for $8 to $10. And while I have less stuff going bad, I also finish stuff before I get tired of it.
In a lot of ways this is more practical and cost-efficient than the co-op. The downside is that I know what I like and tend to gravitate to the same things every week. The co-op forced me to try new things, and I often had an abundance of something so I ended up using it several different ways.
This week I created a rule for myself that I had to get one new thing every time I went to the market. I decided on spaghetti squash on Saturday.
I had heard about spaghetti squash before, and I'm sure plenty of people had told me about it, but I had never tried it. Last fall I kept expecting it to show up in my share, but it never did. I was so enamored with the other winter squashes I had never tried before that I didn't think I was missing anything.
I decided to go ahead and cook the squash on Saturday since I was at home and had some time. I quickly realized I had been missing out on something wonderful. All I did was cook it in the oven for an hour or so and then pull the strands out and heat them with butter on the stove. It was great just like that, but my mind started to churn with possibilities that I'll be experimenting with this week.
And I think spaghetti squash will be on my always get list at the market. What else have I missed that I should try next? I'm considering being brave and trying eggplant.
Monday, September 19, 2011
It's been a while, but an actual post about cooking
After a crazy, busy week, I spent some time cooking this weekend. I finally have a larger kitchen, and I haven't spent that much time cooking in it. But I realized as I was cooking that the kitchen setup actually makes sense. I was making soup and pulled out my immersion blender and realized there is an outlet right by the stove.
After a kitchen with no drawers and one outlet, which meant rotating appliances, this i a very nice change. What is also nice: Throwing all the dirty dishes in the dishwasher, wiping off the counter and having a clean kitchen.
I've tried a couple of new things, I thought I'd post about because in theory this is supposed to be a cooking blog.
After restaurant week, I was inspired to make zucchini cakes/fritters again. I knew I wasn't going to match the zucchini crab cake I had, but I wanted to get close to the zucchini fritter I had. Of course, then I got the job and moved and started the new job... But this weekend I did make a batch of zucchini fritters. I used this recipe from smitten kitchen. The recipe is pretty simple, but the directions are extensive, so I'm just linking it. I thought they turned out really well and were good left over.
I've been using Pioneer Woman's Perfect Pie Crust, and it has worked great. But then she raved about another recipe, and I figured if she thought it was better than hers I probably should try it. I've been making it with all butter and leave out the salt. I used it in a couple of tomato pies and then a zucchini pie this weekend. I'm trying freezing some of the dough this time to see if it works as well as the other one. Again the directions are pretty extensive, so I'm just linking to it.
Also, I bought some kale at the farmers' market last weekend. I am still a little shocked I chose to buy it, but I was on a mission to spend all $8 in cash that I had and have some variety in what I bought. I went to make kale chips and suddenly couldn't remember if there was something else to them besides olive oil and salt (there isn't). I texted a friend and she reassured me I had it right, but also suggested putting the mix for ranch dressing/dip. I tried that yesterday, and it was really good, definitely added some good flavor.
After a kitchen with no drawers and one outlet, which meant rotating appliances, this i a very nice change. What is also nice: Throwing all the dirty dishes in the dishwasher, wiping off the counter and having a clean kitchen.
I've tried a couple of new things, I thought I'd post about because in theory this is supposed to be a cooking blog.
After restaurant week, I was inspired to make zucchini cakes/fritters again. I knew I wasn't going to match the zucchini crab cake I had, but I wanted to get close to the zucchini fritter I had. Of course, then I got the job and moved and started the new job... But this weekend I did make a batch of zucchini fritters. I used this recipe from smitten kitchen. The recipe is pretty simple, but the directions are extensive, so I'm just linking it. I thought they turned out really well and were good left over.
I've been using Pioneer Woman's Perfect Pie Crust, and it has worked great. But then she raved about another recipe, and I figured if she thought it was better than hers I probably should try it. I've been making it with all butter and leave out the salt. I used it in a couple of tomato pies and then a zucchini pie this weekend. I'm trying freezing some of the dough this time to see if it works as well as the other one. Again the directions are pretty extensive, so I'm just linking to it.
Also, I bought some kale at the farmers' market last weekend. I am still a little shocked I chose to buy it, but I was on a mission to spend all $8 in cash that I had and have some variety in what I bought. I went to make kale chips and suddenly couldn't remember if there was something else to them besides olive oil and salt (there isn't). I texted a friend and she reassured me I had it right, but also suggested putting the mix for ranch dressing/dip. I tried that yesterday, and it was really good, definitely added some good flavor.
Wednesday, July 6, 2011
Sign of a good recipe
Want to know the sign of a good recipe? Your mom calls and offers to send you her recipe before realizing she got the recipe from you. So on to some recipes...
I found a link on Twitter to a peach cupcake recipe from smittenkitchen, and she recommended cutting the sugar and the icing and treating them as muffins. They turned out great, just the right amount of peach. Here's the recipe:
Peach muffins
I found a link on Twitter to a peach cupcake recipe from smittenkitchen, and she recommended cutting the sugar and the icing and treating them as muffins. They turned out great, just the right amount of peach. Here's the recipe:
Peach muffins
- 3 cups flour
- 1 1/2 teaspoons baking powder
- 1 1/2 teaspoons baking soda
- 1 teaspoon salt
- Pinch of nutmeg
- 3/4 cup (1 1/2 sticks) butter, at room temperature
- 1/2 cup granulated sugar
- 3/4 cup dark or light brown sugar, packed
- 2 large eggs, lightly beaten
- 1 teaspoon vanilla extract
- 1 1/2 cups full-fat yogurt (or buttermilk or sour cream)
- 3 large peaches, peeled, cored, and chopped smallish (1/3-inch dice)
Preheat the oven to 350°F. Line 28 muffin cups with paper liners.
Sift together the flour, baking powder, baking soda, salt and nutmeg and set aside. Cream the butter and sugars together, beating until fluffy. Add the eggs, one at a time, scraping down the sides and bottom of the bowl between each addition, and then the vanilla. Gently mix in the yogurt. Stir in the dry ingredients and fold in the peach chunks.
Divide the batter evenly among the prepared cupcake liners. Bake for 18 to 22 minutes, or until a tester inserted into the center of cupcakes comes out clean. Cool the cupcakes for five minutes in the tin, then turn them out onto a wire rack to cool completely.
And here's another good peach recipe from Southern Living: Peach enchiladas.
I had okra from my share and needed a side dish for a Fourth of July picnic, here's what I made from AllRecipes:
- 1/2 pound fresh okra, cut into 1/2 inch slices
- 8 cherry tomatoes, halved
- olive oil
- kosher salt and ground black pepper to taste
- garlic powder to taste
- 1/2 cup panko bread crumbs
Preheat an oven to 425 degrees F (220 degrees C).
Place the okra and tomatoes in a bowl. Pour in the olive oil and sprinkle with kosher salt, pepper, and garlic powder. Stir until the vegetables are coated with oil. Add the panko bread crumbs and stir. Spread the vegetables on to a lightly greased baking sheet. Bake for 13 to 15 minutes until the tomatoes are soft and the okra is lightly browned.
Place the okra and tomatoes in a bowl. Pour in the olive oil and sprinkle with kosher salt, pepper, and garlic powder. Stir until the vegetables are coated with oil. Add the panko bread crumbs and stir. Spread the vegetables on to a lightly greased baking sheet. Bake for 13 to 15 minutes until the tomatoes are soft and the okra is lightly browned.
Wednesday, June 22, 2011
Some recipes
This year my co-op is including directions for how to store the produce in its weekly emails, and I've been following their instructions, which means I've been using the drawer in my refrigerator. If you count that drawer, I have two drawer in my kitchen, the other is below my oven. But the drawer in the refrigerator is at the bottom and is not see-through. This means I have on occasion forgotten what was in it.
This happened two weeks ago with my swiss chard. A friend posted a picture of rainbow swiss chard on Facebook, and I suddenly realized I had some that I forgot about completely. I hadn't touched it, so I needed to make something with it pretty quickly. I haven't been too excited about sauteed greens this year, and I was hoping for something different. I did some searching and came up with a recipe for Savory Swiss Chard and Cheese Biscuits. I took them to a dinner on Saturday, and they seemed to be well-liked. Here's the recipe:
Savory Swiss Chard and Cheese Biscuits
This happened two weeks ago with my swiss chard. A friend posted a picture of rainbow swiss chard on Facebook, and I suddenly realized I had some that I forgot about completely. I hadn't touched it, so I needed to make something with it pretty quickly. I haven't been too excited about sauteed greens this year, and I was hoping for something different. I did some searching and came up with a recipe for Savory Swiss Chard and Cheese Biscuits. I took them to a dinner on Saturday, and they seemed to be well-liked. Here's the recipe:
Savory Swiss Chard and Cheese Biscuits
- 3 cups Swiss Chard Green Leafs, Thinly Sliced
- 2 Tablespoons Olive Oil
- 1 teaspoon Salt (I forgot, but based on the reviews and my experience, I would halve this.)
- ½ teaspoons Curry Powder
- 1 cup Sour Cream (heaping Cup)
- 3 whole Large Eggs
- 1 cup Grated Cheddar Cheese (heaping)
- ½ cups Bread Crumbs
- ½ teaspoons Baking Powder
In a glass bowl (or any other microwave safe dish), combine Swiss chard, olive oil, salt and curry. Microwave for 2 minutes, until the greens wilt a bit and smell nice. Drain excess liquid.
In a different bowl, combine sour cream, eggs, cheese, bread crumbs and baking powder. Mix well and add the cooked greens. Mix well.
Divide mixture between 9 (preferably silicone) muffin pan cups or individual baking cups (oil well or line with paper cups if you are not using silicone) and bake in a 350F for 35 minutes.
Serve at room temperature or cold from the fridge. These should come out moist and juicy, so don’t overcook them.
My other experimenting came in the form of chocolate beet cupcakes. I am hesitant to share the recipe I used because I made a lot of substitutions and also cut it to two-thirds when I realized I didn't have enough beets. So I wasn't too happy with the result, and I'm not sure if it's because I changed it or if the beet consistency is still evident when the recipe is followed. But here's the link and now I wish I had tried this one instead.
I also made some old favorites over the weekend. I substituted yellow squash for zucchini in zucchini pie, and then used zucchini to make zucchini bread.
Friday, March 11, 2011
Cupcakes (slightly healthy?)
This year I have found I enjoyed cooking, but I've always enjoyed baking. I'm always looking for ways to make yummy desserts for my friends on restricted diets. Cakeballs have been successful, and for two separate occasions over the last two weeks I made chocolate cupcakes that were vegan AND very tasty if I can say so myself.
I got the recipe from Food Network; these won a Cupcake Wars show. The recipe comes from Chef Chloe. I made a few adjustments based on some of my preferences and what I could actually find at the store. I also only made half the recipe, this made 8 regular size cupcakes or 24 mini cupcakes. Half the recipe of icing was enough for both batches.
Chocolate Strawberry Shortcake Cupcakes
Obviously this recipe could be turned into a non-vegan version by using actual milk and real butter in the icing. But doesn't it sound healthier to say it is vegan?
I will also say I've been eating some homemade granola with the almond milk, and I am actually a fan.
I got the recipe from Food Network; these won a Cupcake Wars show. The recipe comes from Chef Chloe. I made a few adjustments based on some of my preferences and what I could actually find at the store. I also only made half the recipe, this made 8 regular size cupcakes or 24 mini cupcakes. Half the recipe of icing was enough for both batches.
Chocolate Strawberry Shortcake Cupcakes
- 1 ½ cups all-purpose flour
- 1 cup sugar
- 1/3 cup unsweetened cocoa powder
- 1 teaspoon baking soda
- ½ teaspoon salt
- 1 cup coconut milk (I used almond milk because I didn't want any coconut flavor in them.)
- ½ cup vegetable oil
- 2 tablespoons apple cider vinegar
- 2 teaspoons vanilla extract
- 1 teaspoon instant espresso powder (left this out because I couldn't find it)
- Frosting, recipe below
- 1 ½ cups hulled and sliced fresh strawberries
- Confectioners’ sugar, for garnish
Preheat oven to 350 degrees F and line a 12-cup cupcake pan with paper liners.
Sift or whisk together the flour, sugar, cocoa, baking soda, and salt into a bowl. In a separate bowl, mix the coconut milk, oil, vinegar, vanilla, and espresso powder until smooth.
Pour the wet mixture into the dry mixture and mix with a fork or small whisk.
Divide the batter evenly among the prepared cupcake liners until each cup is 2/3 full. Bake for about 20 minutes, or until an inserted toothpick comes out clean.
Once the cupcakes are completely cooled, slice off the top 1/3 of each cupcake and slather with frosting and sliced strawberries. Place the top of the cupcake back on top and add an additional bit of frosting and sliced strawberries. Dust with confectioners’ sugar.
Icing
- 4 cups confectioners' sugar, preferably organic
- 1/2 cup non-hydrogenated shortening (refined coconut oil at room temperature OR vegan margarine will also work)
- 1 tablespoon vanilla extract
- ¼ cup water
Combine the confectioners' sugar, coconut oil, and vanilla extract in the bowl of a stand mixer.
Beat on medium-high speed until combined. With the mixer running, add 1 tablespoon of water at a time, until the desired buttercream consistency. NOTE: You probably will not use all the water. Simply add as needed while beating.
Beat on medium-high speed until combined. With the mixer running, add 1 tablespoon of water at a time, until the desired buttercream consistency. NOTE: You probably will not use all the water. Simply add as needed while beating.
Obviously this recipe could be turned into a non-vegan version by using actual milk and real butter in the icing. But doesn't it sound healthier to say it is vegan?
I will also say I've been eating some homemade granola with the almond milk, and I am actually a fan.
Wednesday, November 24, 2010
Cooking for the family
So as much as I love cooking for just myself, it is more fun to have others around to appreciate my meals.
Before I drove to my parents' house, I picked up my share and was excited about all the winter squash I got. I said before I don't remember being exposed to winter squash, and I soon learned why.
It turns out that my dad does not like sweet potatoes, and pretty much all of the winter squashes taste similar to sweet potatoes. To fully illustrate my dad's dislike of sweet potatoes, my grandmother told me that when he was a kid, he said sweet potatoes and onions would be worse than coal and ashes from Santa Claus.*
But I have continued to cook the things I planned and let my dad fend for himself. My mom seems to enjoy my dishes, and my sister says they are better than other squash dishes she's tried.
So far I've made the butternut squash soup (I tried cooking the squash for less time but it was kind of a pain to peel and chop at that point) and this butternut squash and goat cheese pasta that was excellent. I also experimented with the pumpkin brownies again, using a brownie mix, and they turned out well but not very pretty. I also discovered how easy this pumpkin muffin recipe from Natalie is. My pizza crust was also a hit last night.
The good thing about cooking here is the help I have. I've recruited my mom, dad and sister to do various tasks, and I haven't done very many dishes here!
*I did warn my dad that this was going on the blog, and he says he is still ahead of me in terms of food he likes. But I say mincemeat pie doesn't count.
Wednesday, November 17, 2010
My favorite pie
It's pie week, as declared by the Pioneer Woman, and Thanksgiving is coming up next week. So I thought I would share my family's favorite pie.
It's a classic chocolate pie, excellent with a scoop of vanilla ice cream or straight out of the pie plate. My siblings and I call it Buffy Pie after my maternal grandmother. I think we came up with that name more out of her love for chocolate than her baking. For as long as I can remember, my grandmother used her oven for storage, rather than cooking.
Buffy Pie
(originally from the Huntsville Heritage Cookbook, copyright 1967)
1 stick butter
¼ cup cocoa
2 eggs beaten
1 cup sugar
¼ cup sifted flour
½ teaspoon vanilla
1 cup chopped pecans (We leave these out.)
10 inch unbaked pie shell (Mrs. Smith’s pie crusts work great.)
Blend cocoa into melted butter. Add remaining ingredients, mix well and pour
into pie shell. Bake 25 minutes at 350 degrees. Cool.
It's a classic chocolate pie, excellent with a scoop of vanilla ice cream or straight out of the pie plate. My siblings and I call it Buffy Pie after my maternal grandmother. I think we came up with that name more out of her love for chocolate than her baking. For as long as I can remember, my grandmother used her oven for storage, rather than cooking.
Buffy Pie
(originally from the Huntsville Heritage Cookbook, copyright 1967)
1 stick butter
¼ cup cocoa
2 eggs beaten
1 cup sugar
¼ cup sifted flour
½ teaspoon vanilla
1 cup chopped pecans (We leave these out.)
10 inch unbaked pie shell (Mrs. Smith’s pie crusts work great.)
Blend cocoa into melted butter. Add remaining ingredients, mix well and pour
into pie shell. Bake 25 minutes at 350 degrees. Cool.
Monday, November 8, 2010
Because I'm from the South
And I had green tomatoes, fried green tomatoes were part of my dinner Sunday night.
 I'm not sure what else to do with green tomatoes, but this recipe from my co-op is really good (also I made more than two slices):
This is the last weekend for a while that I will be in town. I ended up doing more than I intended, but I still found time to cook Sunday afternoon. I have to say that time in the kitchen is one of the highlights of my week. More recipes to come this week from my Sunday cooking.

- 9 1/4-inch-thick slices green tomatoes (about 3 tomatoes)
- 1/2 cup all purpose flour
- 1/4 cup yellow cornmeal
- 1 large egg (or 2 medium), beaten to blend
- 1/2 cup olive oil
Sprinkle all green tomato slices with salt and pepper. Place 1/4 cup flour in shallow bowl. Mix remaining 1/4 cup flour with cornmeal in another shallow bowl to blend. Working with 1 green tomato slice at a time, coat with flour, then egg, then flour-cornmeal mixture.
Heat oil in heavy large skillet over medium-high heat. Working in batches, fry green tomatoes until golden brown, about 2 minutes per side. Using slotted spoon, transfer to baking sheet; sprinkle with salt and pepper. Keep warm in oven.
This is the last weekend for a while that I will be in town. I ended up doing more than I intended, but I still found time to cook Sunday afternoon. I have to say that time in the kitchen is one of the highlights of my week. More recipes to come this week from my Sunday cooking.
Friday, November 5, 2010
Some recipe variations
Do you remember this post when I said I couldn't make up my own recipes? Well, I've gotten braver about varying recipes and coming up with some of my own variations. I have two to share with you today.
I've written about cakeballs before, and I make them semi-frequently, usually sticking with the classic red velvet and chocolate combination. But two of my friends are now on a vegan diet, and they both previously loved cakeballs so I wanted to make a version they could eat. I cheated a bit and used Oreos, so I'd still like to try it with a vegan cake but this version was definitely a success.

Of course you can use real cream cheese and whatever chocolate you want if you aren't concerned about avoiding dairy. The mint Oreos and white chocolate is also a good combination.
The second thing I made this week was miniature tomato pies. I still don't have the crust right, I want the crust on the mini quiches you can buy at Sam's, but this is the best I could do for now.

They came out really well. I wish they were warmer for the party I took them to, but everyone enjoyed them anyway.
I've written about cakeballs before, and I make them semi-frequently, usually sticking with the classic red velvet and chocolate combination. But two of my friends are now on a vegan diet, and they both previously loved cakeballs so I wanted to make a version they could eat. I cheated a bit and used Oreos, so I'd still like to try it with a vegan cake but this version was definitely a success.

- 1 package of mint Oreos, crushed (I removed the filling of 10 of the Oreos so the mint wasn't too strong.)
- 8 oz. package of Tofuti cream cheese (I didn't use the whole container, but about 90% of it.)
- Semi-sweet chocolate chips (I found Ghiradelli's were dairy-free, but there are probably others.)
Crumble the Oreos in a food processor and then mix with the softened cream cheese. I use my hand-mixer, but a fork and a spatula work too. You don't want to see any white.
Roll into 1-inch balls and chill in the freezer or refrigerator.
Melt the chocolate chips in the microwave or in a double boiler. Dip the balls in the chocolate to coat.
Of course you can use real cream cheese and whatever chocolate you want if you aren't concerned about avoiding dairy. The mint Oreos and white chocolate is also a good combination.
The second thing I made this week was miniature tomato pies. I still don't have the crust right, I want the crust on the mini quiches you can buy at Sam's, but this is the best I could do for now.

- Mini fillo shells
- Cherry tomatoes
- Mayonnaise
- Pesto
- Mozzerella cheese
- Parmesan cheese
Slice the tomatoes and put in the fillo shells. You can probably put an entire cherry tomato in there, but I was afraid it would make it hard to just take a bite. Mix together the mayonnaise, pesto and cheeses. (The amount is going to vary based on how many cups you are making. I made 15 cups and was low on mayonnaise, but probably used 1/2-cup of mayonnaise, 1 tbsp. of pesto and a small handful of the two cheeses.)
Scoop mayonnaise-pesto mixture into the shells over the tomatoes. When ready to serve, warm in a 350-degree oven for 6-7 minutes.
They came out really well. I wish they were warmer for the party I took them to, but everyone enjoyed them anyway.
Wednesday, October 27, 2010
Food of the week: Broccoli
My mom asked me the other day if I've become a vegetarian. I said no but I very rarely eat meat at home. I enjoy a good steak or chicken when I go out to eat, but at home I'm content with all the vegetables I get in my share.
But in case you're wondering, I do still get a chicken once a month. At any given time, I have at least two in the freezer, and I've been using them when I take dinner to friends, who've recently had babies. But this week I ran out of chicken broth and cooked a chicken in the crock-pot simply for the chicken broth it would create. I just found it amusing that I wanted the broth, not the chicken, but don't worry the chicken is going in a casserole soon.
Anyway, the vegetable of the week is broccoli. My mom had sent me the recipe for Panera's broccoli cheese soup months ago, and I finally had a reason to make it. I'm linking to it because I followed the recipe exactly, though the whole making a roux thing still confuses me. It is very good and tastes like Panera's!
On Saturday I went in to grab a cup of coffee at a cafe in town and saw that their quiche of the day was broccoli and cheddar, giving me some inspiration. I looked for a recipe online, but everything I found got mixed reviews. Ultimately I realized if I had a good quiche recipe, it didn't matter what I put in it. So I actually pulled out a cookbook and made this recipe from the Better Homes and Gardens cookbook:

It turned out really well, and the soup and quiche are providing meals for the week.
But in case you're wondering, I do still get a chicken once a month. At any given time, I have at least two in the freezer, and I've been using them when I take dinner to friends, who've recently had babies. But this week I ran out of chicken broth and cooked a chicken in the crock-pot simply for the chicken broth it would create. I just found it amusing that I wanted the broth, not the chicken, but don't worry the chicken is going in a casserole soon.
Anyway, the vegetable of the week is broccoli. My mom had sent me the recipe for Panera's broccoli cheese soup months ago, and I finally had a reason to make it. I'm linking to it because I followed the recipe exactly, though the whole making a roux thing still confuses me. It is very good and tastes like Panera's!
On Saturday I went in to grab a cup of coffee at a cafe in town and saw that their quiche of the day was broccoli and cheddar, giving me some inspiration. I looked for a recipe online, but everything I found got mixed reviews. Ultimately I realized if I had a good quiche recipe, it didn't matter what I put in it. So I actually pulled out a cookbook and made this recipe from the Better Homes and Gardens cookbook:
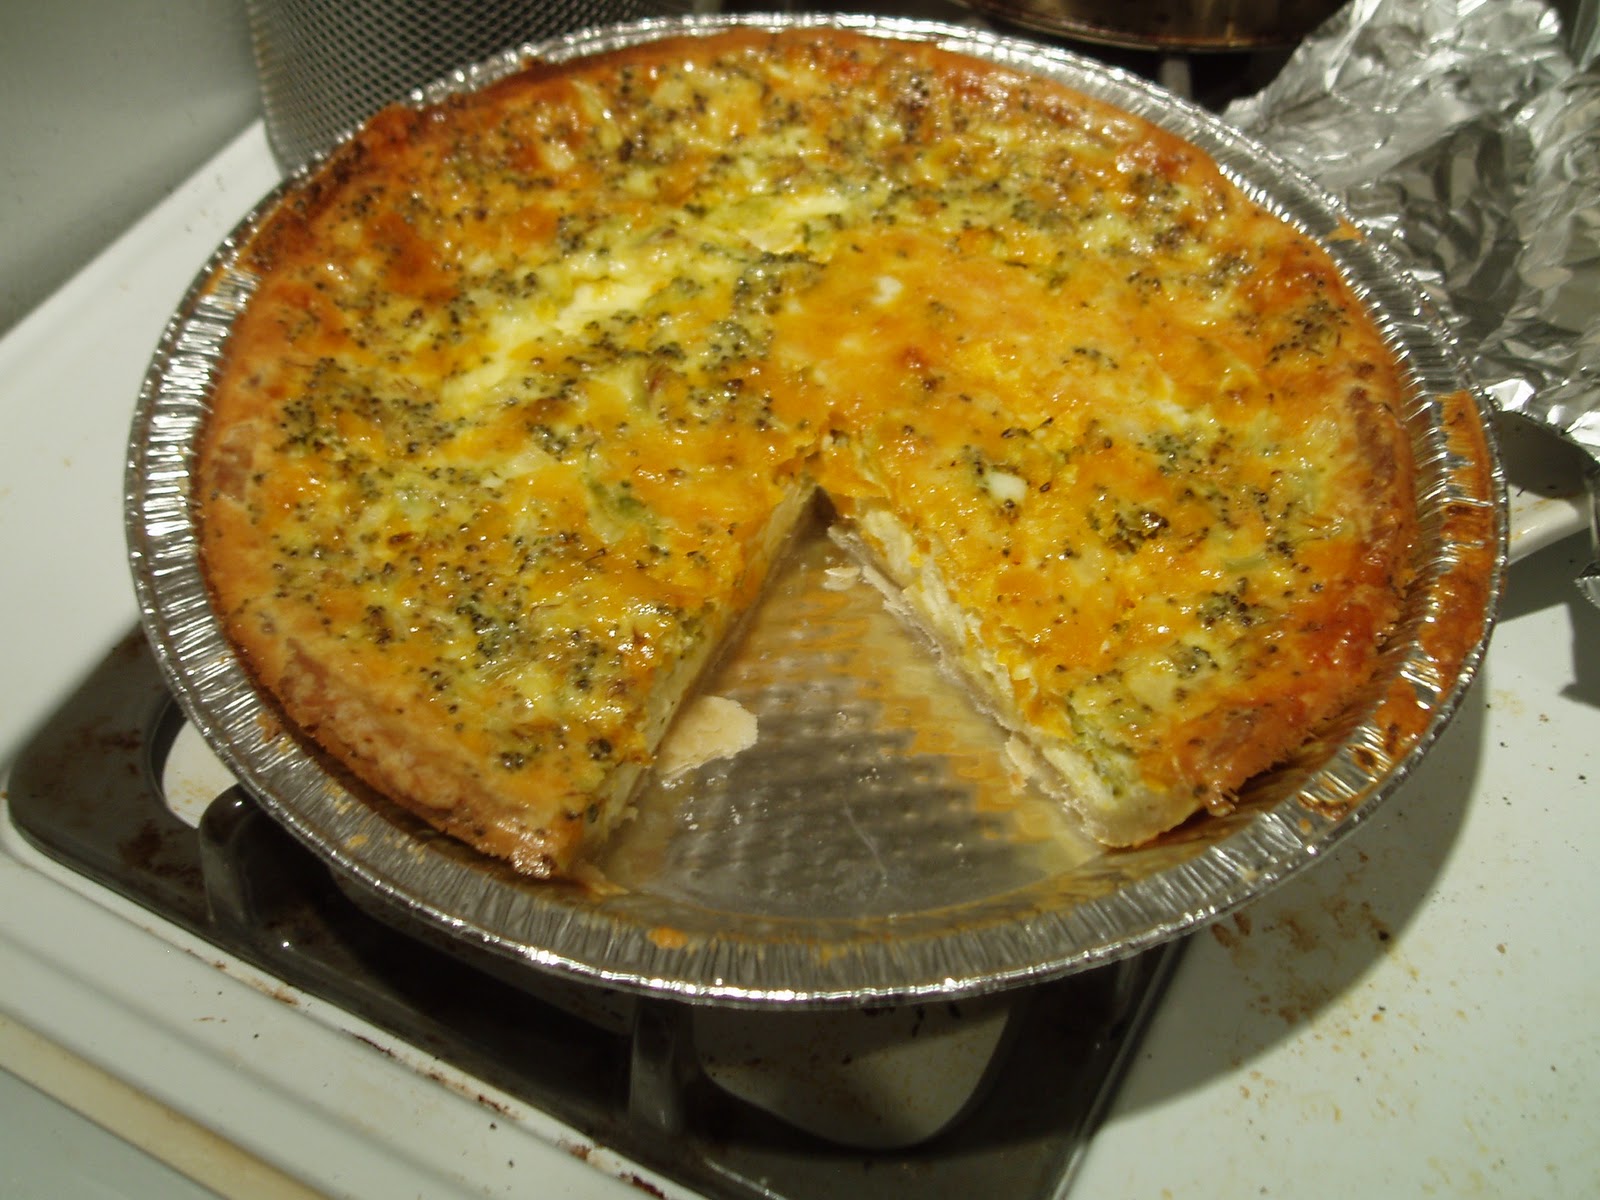
- Pie crust for 9-inch pan (I used this recipe but store-bought would be fine too.)
- 4 beaten eggs
- 1.5 cups of half-and-half, light cream or milk (I used half-and-half.)
- 1/4 cup of sliced green onions (I used about 2 tablespoons of a chopped regular onion.)
- 1/4 tsp. salt
- 1/8 tsp. black pepper
- Dash ground nutmeg
- 3/4 cup of whatever filling you want (broccoli, chicken, ham, other veggies)
- 1.5 cups shredded Swiss, cheddar, Monterey Jack or whatever kind of cheese you want (I used sharp cheddar.)
- 1 tablespoon all-purpose flour
Line a 9-inch pie plate with crust. Line unpricked pastry with a double thickness of foil. Bake in a 450-degree oven for 8 minutes. Remove foil. Bake for 4 to 5 minutes or more until pastry is set and dry. Remove from oven. Reduce the oven temperature to 325 degrees.
In a medium bowl stir together egss, half-and-half, onions, salt, pepper and nutmeg. Stir in broccoli or other filling of your choice. Toss cheese with flour and add to egg mixture. Mix well.
Pour egg mixture into hot, baked pie crust. Bake for 40 to 45 minutes or until knife inserted near center comes out clean. Let stand for 10 minutes before serving.
It turned out really well, and the soup and quiche are providing meals for the week.
Monday, October 18, 2010
Winter squash
Most of the things I am picky about (or was picky about before this experience) were things I had tried or at least seen prepared on a regular basis. But the latest thing I am moving into the like category is not something I've even been in a situation to try until the last year or so. But now I am wondering where winter squash has been all my life.
So far I've gotten delicata squash and carnival squash and I enjoyed both of them. Last week for dinner I found directions for cooking the carnival squash in the microwave. I mashed it up, added some butter and brown sugar and thoroughly enjoyed it and especially liked that it only took 15 minutes.
I still had two carnival squashes left, and I went searching for recipes all week. I found two recipes for soup and then made it up as I went along, and it actually turned out really well.
Here's my rough recipe (I'll probably be eating it all week):
The soup was good, but my other favorite thing is the seeds. I let them dry out, then coat them with olive oil, add salt and roast at 275 degrees for 15 minutes.
Winter squash was one of the things I had been worried about, but now I can't get enough. The other bonus is it doesn't go bad as long as it hasn't been cut. I'm excited to see what variety I'll get this week.
So far I've gotten delicata squash and carnival squash and I enjoyed both of them. Last week for dinner I found directions for cooking the carnival squash in the microwave. I mashed it up, added some butter and brown sugar and thoroughly enjoyed it and especially liked that it only took 15 minutes.
I still had two carnival squashes left, and I went searching for recipes all week. I found two recipes for soup and then made it up as I went along, and it actually turned out really well.
Here's my rough recipe (I'll probably be eating it all week):
- 2 carnival squash
- 1 tbsp. butter
- 1/2 onion, minced
- 1 small potato, chopped
- 4 green beans, cut in small pieces
- 1 cup of chicken or vegetable stock
- Salt, pepper, cinnamon and nutmeg to taste
- 1/2 cup of half and half
Preheat oven to 350 degrees. Cut top off squash, remove seeds, drizzle with olive oil and salt, roast for 45 minutes. Once cooled, scoop out pulp and put in food processor. Process as much as you want or don't. I only pulsed it a few times, I don't like completely pureed soup.
Saute onion in butter in the bottom of a dutch oven or other heavy pot until translucent. Add potato, green beans and chicken stock. Bring to a boil, then turn down heat and allow it to simmer for 20 minutes.
Stir in squash and seasonings and allow to simmer for another 10 minutes. Add cream and let it simmer for another few minutes.
The soup was good, but my other favorite thing is the seeds. I let them dry out, then coat them with olive oil, add salt and roast at 275 degrees for 15 minutes.
Winter squash was one of the things I had been worried about, but now I can't get enough. The other bonus is it doesn't go bad as long as it hasn't been cut. I'm excited to see what variety I'll get this week.
Wednesday, October 13, 2010
There's a reason I make brownies from a box
First of all, in case you were wondering the raccoon is still on the loose. I haven't heard him in a while, but he did trip one of the traps without actually getting caught. Hopefully, he will be gone soon so I can sleep better at night!
Anyway, back to the point of this post: A couple of weeks ago, I was out at lunch and saw some chocolate/pumpkin bars in the bakery section. They looked amazing, and I should have bought one so I could try and figure out how to make them. But instead I just started googling for recipes.
I found a couple, including one from Martha Stewart. But Martha didn't get very good reviews, I started noticing another recipe popping up over and over, so I figured that must be the one I should try.
Here's the recipe, my thoughts are below:
Chocolate Pumpkin Brownies
PUMPKIN BATTER
It wasn't as chocolatey as I was expecting or wanting. It was more like a spice cake with a hint of chocolate. The top of mine had a weird crisp on top, maybe I cooked it too long but the swirl thing definitely didn't work. If it hadn't had the crisp that fell apart when you touched it, I might have added cream cheese icing.
I also learned that there is a reason I have always made brownies from a box. It is complicated to make brownies, and I'm still not convinced I pulled it off. Now I think I'd like to make these again with brownies from a box and add the pumpkin batter on top to see if that improves the consistency while also adding more chocolate flavor. It would also be much easier to just add eggs, vegetable oil and water to the batter!
I also made these muffins from Pioneer Woman. They are definitely moist, but they are a little sweet for me and I even skipped the icing. My muffin supply is running low, so I need some apples or blueberries or more pumpkin to restock my freezer.
Anyway, back to the point of this post: A couple of weeks ago, I was out at lunch and saw some chocolate/pumpkin bars in the bakery section. They looked amazing, and I should have bought one so I could try and figure out how to make them. But instead I just started googling for recipes.
I found a couple, including one from Martha Stewart. But Martha didn't get very good reviews, I started noticing another recipe popping up over and over, so I figured that must be the one I should try.
Here's the recipe, my thoughts are below:
Chocolate Pumpkin Brownies
PUMPKIN BATTER
- 1 tablespoon unsalted butter, softened
- 3 ounces cream cheese, softened
- 1/2 cup sugar
- 1 large egg
- 1/3 cup canned pumpkin puree
- 1 teaspoon pure vanilla extract
- 1/2 teaspoon cinnamon
- 1/2 teaspoon ginger (substituted nutmeg but realized i need to just break down and buy ginger)
- 1 tablespoon all-purpose flour
Preheat the oven to 350 degrees. Lightly butter a 13-by-9-inch baking dish. In a small bowl, using an electric mixer, beat the butter with the cream cheese until smooth. Beat in the sugar, scraping the bowl occasionally. Beat in the egg, then add the pumpkin puree, vanilla, cinnamon and ginger. Stir in the flour.
CHOCOLATE BATTER
- 5 1/2 ounces best-quality semisweet chocolate, finely chopped
- 1 1/4 sticks (5 ounces) unsalted butter, cut into 1-inch pieces
- 4 large eggs, at room temperature
- 1 1/2 cups sugar
- 1 teaspoon pure vanilla extract
- 1/4 teaspoon salt
- 1 1/3 cups all-purpose flour
- 1 heaping cup large walnut pieces (about 4 ounces), optional (went without them)
Combine the semisweet chocolate and butter in a medium bowl. Set the bowl over a saucepan with 1 inch of simmering water and stir occasionally until melted. In a large bowl, combine the eggs with the sugar, vanilla and salt; set the bowl over the saucepan of simmering water and, using an electric mixer, beat at low speed until blended. Increase the speed to medium and beat until the mixture is warm to the touch. Remove from the heat and continue to beat until the mixture is thick and fluffy, about 5 minutes. Using a large rubber spatula, fold in the melted chocolate. Sift the flour over the warm batter and fold it in just until combined. Fold in the walnut pieces.
Spread the chocolate batter evenly in the prepared pan. Using a tablespoon, drop dollops of the pumpkin batter all over the top. Using the back of a butter knife, swirl the pumpkin batter into the chocolate; don't overdo it or the swirl pattern will be lost. Bake for about 50 minutes, or until skewer inserted in the center comes out clean. Let the brownies cool completely before cutting.
Spread the chocolate batter evenly in the prepared pan. Using a tablespoon, drop dollops of the pumpkin batter all over the top. Using the back of a butter knife, swirl the pumpkin batter into the chocolate; don't overdo it or the swirl pattern will be lost. Bake for about 50 minutes, or until skewer inserted in the center comes out clean. Let the brownies cool completely before cutting.
It wasn't as chocolatey as I was expecting or wanting. It was more like a spice cake with a hint of chocolate. The top of mine had a weird crisp on top, maybe I cooked it too long but the swirl thing definitely didn't work. If it hadn't had the crisp that fell apart when you touched it, I might have added cream cheese icing.
I also learned that there is a reason I have always made brownies from a box. It is complicated to make brownies, and I'm still not convinced I pulled it off. Now I think I'd like to make these again with brownies from a box and add the pumpkin batter on top to see if that improves the consistency while also adding more chocolate flavor. It would also be much easier to just add eggs, vegetable oil and water to the batter!
I also made these muffins from Pioneer Woman. They are definitely moist, but they are a little sweet for me and I even skipped the icing. My muffin supply is running low, so I need some apples or blueberries or more pumpkin to restock my freezer.
Monday, August 30, 2010
Back in the kitchen
I don't even know what happened last week. It just felt like life took over, and the blog took a backseat. But after a fun trip to a women's conference and some much needed rest, I got to spend most of Sunday in the kitchen. Something I was actually looking forward to.
I tried a couple of new recipes, so I wanted to get them posted.
In my pickup this week, I got some beautiful tomatoes. Lately I've been feeling like my tomatoes have gone to waste, and my sister suggested a tomato pie. My mom sent me her recipe, and it turned out pretty well. Here's the recipe:

Tomato Pesto Tart
For the first time in a few months, I didn't have anything in my freezer to pull out for breakfast. I finished my last peach scone Sunday morning, so I had to come up with something to eat this week.
My peaches were a little rough this week, and I figured the best way to use them before they were unusable was to put them in something. I found this simple peach muffin recipe in a Google search. It reminds me of my zucchini bread recipe, and it tastes good but the peaches don't have a strong flavor. I got white peaches this week (at least that's what I think they are), so that may have something to do with it. But the muffins taste good to me.

Peach muffins
• 3 cups all-purpose flour
• 1 tablespoon ground cinnamon
• 1 teaspoon baking soda
• 1 teaspoon salt
• 1 1/4 cups vegetable oil
• 3 eggs, lightly beaten
• 2 cups white sugar
• 2 cups peeled, pitted, and chopped peaches
Preheat oven to 400 degrees. Lightly grease 16 muffin cups. (Mine made about 2 dozen medium muffins.)
In a large bowl, mix the flour, cinnamon, baking soda, and salt. In a separate bowl, mix the oil, eggs, and sugar. Stir the oil mixture into the flour mixture just until moist. Fold in the peaches. Spoon into the prepared muffin cups.
Bake 25 minutes in the preheated oven, until a toothpick inserted in the center of a muffin comes out clean. Cool 10 minutes before turning out onto wire racks to cool completely.
I tried a couple of new recipes, so I wanted to get them posted.
In my pickup this week, I got some beautiful tomatoes. Lately I've been feeling like my tomatoes have gone to waste, and my sister suggested a tomato pie. My mom sent me her recipe, and it turned out pretty well. Here's the recipe:

Tomato Pesto Tart
- 1 sheet package refrigerated pie crust (I used one of my pie crusts from this recipe that's been in my freezer.)
- 2 cups shredded mozzarella cheese, divided
- 5-6 plum/roma tomatoes, sliced (One large tomato thinly sliced works, too.)
- 1/2 cup mayonnaise
- 1/4 cup grated Parmesan cheese
- 2 Tbs. jarred Pesto (I used my homemade pesto.)
- 1/2 tsp. ground pepper
- 1 Tbs. fresh basil, chopped
Fit piecrust into a lightly greased 9 inch tart pan, trim off excess piecrust along edges. Prick bottom of crust with a fork.
Bake at 425 for 8-10 minutes. Remove from oven. Sprinkle with 1 cup mozzarella, let stand 15 minutes. Arrange tomato slices over cheese.
Stir together mayo, next 3 ingredients, and remaining 1 cup mozzarella cheese. Spread mixture evenly over tomato slices.
Bake at 375 for 20-25 minutes. Remove from oven. Sprinkle with chopped fresh basil.
Bake at 425 for 8-10 minutes. Remove from oven. Sprinkle with 1 cup mozzarella, let stand 15 minutes. Arrange tomato slices over cheese.
Stir together mayo, next 3 ingredients, and remaining 1 cup mozzarella cheese. Spread mixture evenly over tomato slices.
Bake at 375 for 20-25 minutes. Remove from oven. Sprinkle with chopped fresh basil.
For the first time in a few months, I didn't have anything in my freezer to pull out for breakfast. I finished my last peach scone Sunday morning, so I had to come up with something to eat this week.
My peaches were a little rough this week, and I figured the best way to use them before they were unusable was to put them in something. I found this simple peach muffin recipe in a Google search. It reminds me of my zucchini bread recipe, and it tastes good but the peaches don't have a strong flavor. I got white peaches this week (at least that's what I think they are), so that may have something to do with it. But the muffins taste good to me.

Peach muffins
• 3 cups all-purpose flour
• 1 tablespoon ground cinnamon
• 1 teaspoon baking soda
• 1 teaspoon salt
• 1 1/4 cups vegetable oil
• 3 eggs, lightly beaten
• 2 cups white sugar
• 2 cups peeled, pitted, and chopped peaches
Preheat oven to 400 degrees. Lightly grease 16 muffin cups. (Mine made about 2 dozen medium muffins.)
In a large bowl, mix the flour, cinnamon, baking soda, and salt. In a separate bowl, mix the oil, eggs, and sugar. Stir the oil mixture into the flour mixture just until moist. Fold in the peaches. Spoon into the prepared muffin cups.
Bake 25 minutes in the preheated oven, until a toothpick inserted in the center of a muffin comes out clean. Cool 10 minutes before turning out onto wire racks to cool completely.
I'm looking forward to a quiet week, and maybe even more time in the kitchen. I've got some green beans and peppers I need to do something with.
Wednesday, July 28, 2010
Chicken failure
I had accumulated two chickens in my freezer, and I was at the end of most of my produce from last week, so it was time to cook some chicken. After cooking my last two chickens in the crock pot, I wanted to try roasting it.
Of course, where do I turn? Pioneer Woman, of course. She actually has a guest cook post a recipe for Herb Roasted Chicken, but my sister had tried it and said it was good. So I defrosted my chicken, and on Sunday night followed the recipe. It's really simple:
Now that I read the directions again I see my mistakes. Because I definitely screwed this chicken up. First of all, I only had vegetable oil, not canola oil, (probably not a huge deal) and I forgot the salt and pepper. But that's nothing compared to the fact I read these recipe a few days before making it and thought I remembered everything, but I set my oven to 400 degrees. Yeah, the top of my chicken was cooked, but when I started to pull off the meat to store, I discovered the chicken was not cooked. It went back in the oven but of course that made it pretty dry.
So I have to say, this was a total fail for me. But at least I wasn't serving it to anyone else, and I've learned my lesson.
Of course, failure only makes me want to try and get it right, so hopefully I will be able to post my success at this recipe at some point.
I will note that it's been good to have chicken around again. I've been able to turn around dinner in 20 minutes or less this week, a good thing since I get home from work at 8 p.m.
Of course, where do I turn? Pioneer Woman, of course. She actually has a guest cook post a recipe for Herb Roasted Chicken, but my sister had tried it and said it was good. So I defrosted my chicken, and on Sunday night followed the recipe. It's really simple:
- 3-4lb Whole Chicken
- Something to stuff inside the chicken (Apple, Onion, Lemon, Garlic, Carrot, etc.)
- Canola Oil (1 tablespoon)
Salt (1 tablespoon) and Pepper (1 teaspoon) - Fresh Herbs (1-2 tablespoons)
Heat oven to 450 degrees. Stuff chicken with "aromatics."
Chop herbs and mix with canola oil, salt and pepper. Rub chicken with herb mixture. Rub it on all sides.
Cook for an hour and 15 minutes. Let the chicken rest for 15 minutes and then serve.
Now that I read the directions again I see my mistakes. Because I definitely screwed this chicken up. First of all, I only had vegetable oil, not canola oil, (probably not a huge deal) and I forgot the salt and pepper. But that's nothing compared to the fact I read these recipe a few days before making it and thought I remembered everything, but I set my oven to 400 degrees. Yeah, the top of my chicken was cooked, but when I started to pull off the meat to store, I discovered the chicken was not cooked. It went back in the oven but of course that made it pretty dry.
So I have to say, this was a total fail for me. But at least I wasn't serving it to anyone else, and I've learned my lesson.
Of course, failure only makes me want to try and get it right, so hopefully I will be able to post my success at this recipe at some point.
I will note that it's been good to have chicken around again. I've been able to turn around dinner in 20 minutes or less this week, a good thing since I get home from work at 8 p.m.
Wednesday, July 21, 2010
Recipes galore
I managed to find some inspiration and cooked up a few things this week. Of course the major accomplishment is that I finished the green beans!
As I said last week I was looking for a new way to make green beans and since I got tomatoes this week I did some googling for recipes. I came up with this, and though it wasn't my favorite, it made for a decent dinner and used up the green beans. Of course I only made as much I wanted to actually eat and guessed at the amounts.
Sauteed Green Beans with Tomatoes and Basil
• 1 1/2 pounds fresh green beans, trimmed
• 2 tablespoons unsalted butter
• 1 tablespoon olive oil
• 3 large shallots, thinly sliced (left these out)
• 2 garlic cloves, minced
• 1 (14 1/2-ounce) can diced tomatoes (I used fresh)
• 1/4 cup dry white wine
• 2 tablespoons thinly sliced fresh basil
• Salt and freshly ground black pepper
• Parmesan Crisps (I didn't make these, it's basically cooking a clump of parmesan cheese, but I do wish I had added parmesan cheese at the end.)
Then I took the advice of the commenters on my last post about the plums. I found this recipe for a peach and plum jam/spread that was surprisingly easy, and it tastes pretty good too!
Microwave Peach Plum Butter Recipe
• 1 cup finely chopped, peeled peaches
• 1 cup pitted, chopped plums
• 1 tablespoon water
• 1/2 teaspoon ground cinnamon
• 1/2 teaspoon ground ginger (I used nutmeg because I didn't
• 1/2 cup granular no-calorie sucralose sweetener (such as Splenda®)
Then last night I halved the three plums I had left and cooked them on my grill pan and added them to a salad. (I have to add that my grill pan is one of the best purchases I've made for my kitchen. This week alone I've grilled corn, plums and cooked pancakes on the griddle side.)
A few weeks ago, I found this recipe for cornbread that calls for fresh corn and basil, but I was out of corn and my basil was dead (some rain and me actually watering the plant have brought it back to life, though I can't say the same for my thyme). Anyway, I decided to make it last night to have with my salad. It is good cornbread, but the basil that gives it an interesting flavor.
Fresh Corn and Basil Cornbread
• 1 1/2 cups buttermilk (One of the greatest tricks I learned from Pioneer Woman is that you can make buttermilk by adding a tablespoon of white vinegar to a cup of lowfat milk, adjust based on how much you need.)
• 3 large eggs
• 1/3 cup chopped fresh basil
• 2 cups yellow cornmeal
• 1 cup all purpose flour
• 1/2 cup sugar
• 4 teaspoons baking powder
• 1 teaspoon salt
• 1/2 cup (1 stick) chilled unsalted butter, diced (I only had salted butter and had already mixed in the salt. I didn't think it came out too salty though.)
• 1 1/2 cups fresh cornkernels (from 3 ears)
And then because apparently cooking has become my latest hobby (and I worked an earlier shift), I decided to make blueberry muffins. Not that I need anymore muffins, but this is the last batch of blueberries until I get frozen ones in November and I had been wanting to try this recipe (plus this is probably the only time I'll have plain yogurt). Pioneer Woman calls these the Awesome-est Blueberry Muffins, and I have to agree. They are by far the best muffins I've made.
The Awesome-est Blueberry Muffins
There's also a recipe for a yogurt blueberry sauce, but I didn't think it was necessary.
I've still got a few things left, but I think I'm going to have to pull out a chicken soon!
As I said last week I was looking for a new way to make green beans and since I got tomatoes this week I did some googling for recipes. I came up with this, and though it wasn't my favorite, it made for a decent dinner and used up the green beans. Of course I only made as much I wanted to actually eat and guessed at the amounts.
Sauteed Green Beans with Tomatoes and Basil
• 1 1/2 pounds fresh green beans, trimmed
• 2 tablespoons unsalted butter
• 1 tablespoon olive oil
• 3 large shallots, thinly sliced (left these out)
• 2 garlic cloves, minced
• 1 (14 1/2-ounce) can diced tomatoes (I used fresh)
• 1/4 cup dry white wine
• 2 tablespoons thinly sliced fresh basil
• Salt and freshly ground black pepper
• Parmesan Crisps (I didn't make these, it's basically cooking a clump of parmesan cheese, but I do wish I had added parmesan cheese at the end.)
Cook the green beans in a large pot of boiling water until just crisp-tender, about 3 minutes. Drain and rinse in cold water. Drain well; set aside.
Melt the butter and oil in a heavy, large skillet over medium heat. Add the shallots and garlic and saute until tender, about 2 minutes. Add the tomatoes and cook until heated through, about 3 minutes. Add the beans and cook until the juices evaporate and the beans are almost tender, stirring often, about 10 minutes. Stir in the wine and basil. Simmer 2 minutes longer. Season with salt and pepper, to taste. Transfer to a serving bowl, and serve.
Melt the butter and oil in a heavy, large skillet over medium heat. Add the shallots and garlic and saute until tender, about 2 minutes. Add the tomatoes and cook until heated through, about 3 minutes. Add the beans and cook until the juices evaporate and the beans are almost tender, stirring often, about 10 minutes. Stir in the wine and basil. Simmer 2 minutes longer. Season with salt and pepper, to taste. Transfer to a serving bowl, and serve.
Then I took the advice of the commenters on my last post about the plums. I found this recipe for a peach and plum jam/spread that was surprisingly easy, and it tastes pretty good too!
Microwave Peach Plum Butter Recipe
• 1 cup finely chopped, peeled peaches
• 1 cup pitted, chopped plums
• 1 tablespoon water
• 1/2 teaspoon ground cinnamon
• 1/2 teaspoon ground ginger (I used nutmeg because I didn't
• 1/2 cup granular no-calorie sucralose sweetener (such as Splenda®)
Combine peaches, plums, and water in a microwave-safe glass or ceramic bowl. Heat in the microwave on high in 3 minute intervals, stirring between heating, until mixture is very thick, about 15 minutes. Stir in the cinnamon, ginger, and sweetener. Pour fruit butter into a jar. Cover and refrigerate until ready to use.
Then last night I halved the three plums I had left and cooked them on my grill pan and added them to a salad. (I have to add that my grill pan is one of the best purchases I've made for my kitchen. This week alone I've grilled corn, plums and cooked pancakes on the griddle side.)
A few weeks ago, I found this recipe for cornbread that calls for fresh corn and basil, but I was out of corn and my basil was dead (some rain and me actually watering the plant have brought it back to life, though I can't say the same for my thyme). Anyway, I decided to make it last night to have with my salad. It is good cornbread, but the basil that gives it an interesting flavor.
Fresh Corn and Basil Cornbread
• 1 1/2 cups buttermilk (One of the greatest tricks I learned from Pioneer Woman is that you can make buttermilk by adding a tablespoon of white vinegar to a cup of lowfat milk, adjust based on how much you need.)
• 3 large eggs
• 1/3 cup chopped fresh basil
• 2 cups yellow cornmeal
• 1 cup all purpose flour
• 1/2 cup sugar
• 4 teaspoons baking powder
• 1 teaspoon salt
• 1/2 cup (1 stick) chilled unsalted butter, diced (I only had salted butter and had already mixed in the salt. I didn't think it came out too salty though.)
• 1 1/2 cups fresh cornkernels (from 3 ears)
Preheat oven to 400°F. Butter 9x9x2-inch metal baking pan. Whisk buttermilk, eggs, and basil in large bowl. Blend cornmeal and next 4 ingredients in food processor for 5 seconds. Add 1/2 cup butter; blend until coarse meal forms. Add corn kernels. Using 8 on/off turns, blend until kernels are coarsely chopped. Stir dry ingredients into buttermilk mixture; transfer to pan.
Bake cornbread until golden on top and tester inserted into center comes out clean, about 45 minutes. Cool 20 minutes. Serve warm or at room temperature.
Bake cornbread until golden on top and tester inserted into center comes out clean, about 45 minutes. Cool 20 minutes. Serve warm or at room temperature.
And then because apparently cooking has become my latest hobby (and I worked an earlier shift), I decided to make blueberry muffins. Not that I need anymore muffins, but this is the last batch of blueberries until I get frozen ones in November and I had been wanting to try this recipe (plus this is probably the only time I'll have plain yogurt). Pioneer Woman calls these the Awesome-est Blueberry Muffins, and I have to agree. They are by far the best muffins I've made.
The Awesome-est Blueberry Muffins
- 3 cups minus 2 tablespoons flour
- 1 teaspoon baking soda
- 2 teaspoons baking powder
- Heavy pinch of salt
- Dash of Nutmeg
- 1 cup sugar
- 1/2 cup vegetable oil
- 1 egg
- 1 generous cup plain, unflavored yogurt (throw in extra if you want)
- 2 cups fresh blueberries
- Vanilla Extract
- Softened Butter, for muffin tins
- Turbinado sugar (optional)
Preheat oven to 385 degrees.
In a large bowl sift flour, baking soda, nutmeg, baking powder, and salt. Set aside.
In another large bowl whisk together sugar, oil, capful of vanilla, egg, and yogurt. Add the dry ingredients and stir to a count of 10.
Add blueberries, reserving 1/2 cup, to mixture and stir 3 times.
Add mixture to well-buttered muffin pans. Sprinkle remaining berries on top and press down lightly. Sprinkle turbinado sugar over top. (Brown sugar can be used instead.)
Bake 20 to 25 minutes and allow to cool completely.
In another large bowl whisk together sugar, oil, capful of vanilla, egg, and yogurt. Add the dry ingredients and stir to a count of 10.
Add blueberries, reserving 1/2 cup, to mixture and stir 3 times.
Add mixture to well-buttered muffin pans. Sprinkle remaining berries on top and press down lightly. Sprinkle turbinado sugar over top. (Brown sugar can be used instead.)
Bake 20 to 25 minutes and allow to cool completely.
There's also a recipe for a yogurt blueberry sauce, but I didn't think it was necessary.
I've still got a few things left, but I think I'm going to have to pull out a chicken soon!
Friday, July 16, 2010
The never ending green beans
A few weeks ago I discovered that I did like fresh green beans and found some good ways to prepare them. Then I got another pound of green beans at my next pick-up, and I'm starting to think they are multiplying in my fridge. I swear I've been eating them, but there's always more that need to be eaten.
When I went out to eat last weekend, the waitress said they didn't have green beans as the menu said but had asparagus instead. I was ready to make a trade to get some asparagus for my green beans. Something tells me they would not have gone for it.
Anyway, I was starting to feel like I had no other way to cook them until I did some searching on allrecipes. I found this recipe for pasta with green beans, new potatoes, pesto and yogurt, which shockingly I had all of the ingredients. (I bought the yogurt for peach smoothies.) While I would have left out the potatoes, this was actually a good way to eat my green beans, in fact I considered them the key ingredient, although I'll eat just about anything with some pesto on it.
I woke up with a cold Wednesday morning (still not sure why since it's July!), and I decided to eat more green beans for dinner last night since I couldn't taste anything anyway. I was talking with someone about preparing the green beans the same way I cooked asparagus (i.e. with olive salt in the toaster oven). I also cooked some thinly sliced new potatoes, and it actually made for a decent meal considering I wasn't that hungry to begin with.
But even after all of that, I still have green beans left, but it doesn't look like I will be getting more with my share this week, which is a relief!
When I went out to eat last weekend, the waitress said they didn't have green beans as the menu said but had asparagus instead. I was ready to make a trade to get some asparagus for my green beans. Something tells me they would not have gone for it.
Anyway, I was starting to feel like I had no other way to cook them until I did some searching on allrecipes. I found this recipe for pasta with green beans, new potatoes, pesto and yogurt, which shockingly I had all of the ingredients. (I bought the yogurt for peach smoothies.) While I would have left out the potatoes, this was actually a good way to eat my green beans, in fact I considered them the key ingredient, although I'll eat just about anything with some pesto on it.
I woke up with a cold Wednesday morning (still not sure why since it's July!), and I decided to eat more green beans for dinner last night since I couldn't taste anything anyway. I was talking with someone about preparing the green beans the same way I cooked asparagus (i.e. with olive salt in the toaster oven). I also cooked some thinly sliced new potatoes, and it actually made for a decent meal considering I wasn't that hungry to begin with.
But even after all of that, I still have green beans left, but it doesn't look like I will be getting more with my share this week, which is a relief!
Wednesday, July 7, 2010
Pick-up #6
I did pick up a share this week, I just haven't had a chance to get a post up. I got some of the usual suspects: Bibb lettuce, green beans and cucumbers. But I got a few new things too.
 Blackberries, these are amazing. I have eaten all of them, just plain. I had recipes to try, but these were so sweet and good, I just ate them all.
 Blueberries. These are good blueberries, but I've learned I don't really like just plain blueberries. So I've made blueberry muffins, blueberry pancakes and even a blueberry sauce to put on some ice cream. And the blueberries were amazing for all of those things, apparently I just need my blueberries warm.
 New potatoes. I've made some of these stuffed potatoes and then these roasted potatoes.
 Corn. I picked up a few extra ears and served corn on the cob when I had people over on the Fourth. I'm not sure if I had Kroger corn or some from the co-op, but either way it was really good.
I picked up my share early, so I feel like I'm going through it quickly, but I still have a lot of green beans left. And I pretty much live on cucumber and tomato sandwiches for lunch.


I picked up my share early, so I feel like I'm going through it quickly, but I still have a lot of green beans left. And I pretty much live on cucumber and tomato sandwiches for lunch.
Wednesday, June 30, 2010
Evidence
I ran out of flour on Monday night.
I don't think I've ever run out of flour in the middle of a recipe or even run out of flour at all. And this was particularly surprising because I remember actually buying the bigger bag of flour within the last six or seven months.
I mention this because it's the latest sign that my habits are changing. I've gone weeks with only going by the grocery store for cereal, milk and granola bars and maybe a few other odds and ends to complete a recipe. But I've been eating better than I ever have since living on my own.
On Saturday, I stopped by the Farmer's Market and picked up a zucchini and a tomato to tide me over until my share this week. I've made two dinners with leftovers for lunch and my breakfast for the week with those two vegetables. Even four months ago, I never would have thought I could have made even one dinner with those vegetables, much less two when I wanted to eat the leftovers.
But it hasn't just been lunch and dinner that have been affected. The reason I'm out of flour is because I've been making more stuff for breakfast from scratch. Breakfast is one of my favorite meals, and I literally can't even talk to anyone before I've had my cereal. I don't give myself a lot of time in the morning, but I need something besides cereal.
For the past few years, I've made muffins from a package (just add milk), cinnamon rolls from a can or bought banana bread from the store. But I can't tell you the last time I've had any of those things. I've been eating zucchinni bread (also in muffin form this week) and scones and despite their appearance cinnamon rolls from scratch. And I can't wait to get some blueberries (coming this week!), so I can make blueberry muffins from scratch.
I look in my pantry and refrigerator, even my freezer, and wonder who has taken over my kitchen. Although the expired stuff that accumulates in the fridge does give me away, I'm still amazed at how different it is just three months after I started this experiment. Another strange thing, I actually gave up my bread share when I realized wasn't eating it because there was too much other good stuff and no need for peanut butter sandwiches.
I am going to leave you with this recipe for grilled pizzas from Every Day Food. I put sauteed zucchini, tomatoes and garlic on it with just some olive oil for sauce and then topped it with gruyere cheese (a rare splurge for me). Best homemade pizza I've ever made (so good I ate it before I took a photo).
Pizza dough
Grilling
I don't think I've ever run out of flour in the middle of a recipe or even run out of flour at all. And this was particularly surprising because I remember actually buying the bigger bag of flour within the last six or seven months.
I mention this because it's the latest sign that my habits are changing. I've gone weeks with only going by the grocery store for cereal, milk and granola bars and maybe a few other odds and ends to complete a recipe. But I've been eating better than I ever have since living on my own.
On Saturday, I stopped by the Farmer's Market and picked up a zucchini and a tomato to tide me over until my share this week. I've made two dinners with leftovers for lunch and my breakfast for the week with those two vegetables. Even four months ago, I never would have thought I could have made even one dinner with those vegetables, much less two when I wanted to eat the leftovers.
But it hasn't just been lunch and dinner that have been affected. The reason I'm out of flour is because I've been making more stuff for breakfast from scratch. Breakfast is one of my favorite meals, and I literally can't even talk to anyone before I've had my cereal. I don't give myself a lot of time in the morning, but I need something besides cereal.
For the past few years, I've made muffins from a package (just add milk), cinnamon rolls from a can or bought banana bread from the store. But I can't tell you the last time I've had any of those things. I've been eating zucchinni bread (also in muffin form this week) and scones and despite their appearance cinnamon rolls from scratch. And I can't wait to get some blueberries (coming this week!), so I can make blueberry muffins from scratch.
I look in my pantry and refrigerator, even my freezer, and wonder who has taken over my kitchen. Although the expired stuff that accumulates in the fridge does give me away, I'm still amazed at how different it is just three months after I started this experiment. Another strange thing, I actually gave up my bread share when I realized wasn't eating it because there was too much other good stuff and no need for peanut butter sandwiches.
I am going to leave you with this recipe for grilled pizzas from Every Day Food. I put sauteed zucchini, tomatoes and garlic on it with just some olive oil for sauce and then topped it with gruyere cheese (a rare splurge for me). Best homemade pizza I've ever made (so good I ate it before I took a photo).
Pizza dough
- 1 teaspoon sugar
- 1 packet active dry yeast
- 2 teaspoons extra virgin olive oil, plus more for bowl and brushing
- Coarse salt and ground pepper
- 2 1/4 cups all-purpose flour, plus more for work surface
Pour 1 cup warm water into a medium bowl; add sugar and sprinkle with yeast. Let stand until foamy, 5 minutes.
Whisk oil and 1 teaspoon salt into yeast mixture. Add flour and stir until liquid is incorporated. Turn out onto floured work surface. Knead until dough comes together in an elastic ball, 2 minutes. Transfer to an oiled medium bowl; brush lightly with oil. Cover bowl with plastic wrap; set in a warm, draft-free place place until dough has doubled in bulk, 45 minutes. Punch down dough and cover; let rise another 30 minutes.
Turn out dough onto a lightly floured work surface. Divide into 4 equal pieces. Let rest 15 minutes before using.
Also, you can refrigerate dough pieces, covered, up to two days, or freeze up to one month.
Grilling
Heat grill on one side at medium-high heat. Lightly oil hot grill.
Stretch or roll out one piece of dough into a 10-inch long oval. Brush one side lightly with olive oil and season with coarse salt and ground pepper.
Place dough, oiled side down directly over grill. Brush top of dough with olive oil and cook until underside is light charred and bubbles form all over top, 1 or 2 minutes. With tongs, flip dough and cook until lightly charred, 1 to 2 minutes. Slide dough to cooler side of grill (or turn down heat for grill pan).
Top with desired cheese and toppings; cover grill. Cook until cheese melts and toppings are heated through, 2 to 5 minutes.
Subscribe to:
Posts (Atom)


 Posts
Posts

